QuickBooks to Denali: A Migration Guide for Businesses
As a business grows, its accounting needs can change. Reports that once took minutes may require several spreadsheets, account structures may become harder to manage, and routine financial tasks may involve more manual work than they should.
If you’re considering moving from QuickBooks to Denali, it’s worth planning the transition before you begin. You’ll need to decide which records to transfer, prepare your QuickBooks exports, configure your new Denali organization, and check that the imported data is accurate.
The process involves more than moving financial records from one system to another. It also gives you an opportunity to review your accounting setup and make sure Denali is configured for the way your business operates.
Why consider moving from QuickBooks to Denali?
QuickBooks may meet your accounting needs for years, but changes in your business can introduce new requirements. You may need more control over financial records, different reporting capabilities, or accounting workflows that better support your operations.
Before switching, identify the specific limitations you’re trying to address. Are you spending too much time preparing reports? Do you need better visibility into payables and receivables? Are inventory, payroll, or other accounting processes becoming harder to manage?
Denali offers accounting modules that include General Ledger, Accounts Payable, Accounts Receivable, Inventory, Payroll, and Sales. The right configuration depends on which functions your business needs.
Make a list of your current requirements and compare them with the available Denali modules. This will help you determine whether a move makes sense and what you’ll need to configure before going live.
Prepare your QuickBooks data before migration
A little preparation can make the import process easier to manage. Start by reviewing your existing records and identifying the information you need in Denali.
1. Review your QuickBooks records
Check for duplicate customers and vendors, inactive accounts, inconsistent names, and outdated inventory records. Correct errors where possible and keep a note of anything that needs further review.
Before exporting data, create a backup of your QuickBooks company file. Save copies of the financial reports you’ll use to verify the imported information later.
2. Identify the data you need to import
Denali’s QuickBooks import process supports master records such as general ledger accounts, customers, vendors, inventory items, and employees. General ledger and sales transaction history can also be imported when the required files and conditions are met.
Review your current setup and decide which records you need in Denali. Consider both the information required for daily accounting and the historical details your team may need for reporting or reference.
If you plan to import general ledger transaction history, include inactive accounts in your general ledger accounts export. The import guide also specifies particular QuickBooks reports for transaction history, so check the requirements before preparing your files.
3. Prepare the required Excel files
QuickBooks data must be exported to Excel files before it can be imported into Denali. The exact files and fields depend on the records you’re transferring.
For general ledger transaction history, the documented process requires the Transaction Detail by Account report. For sales transaction history, it requires the Sales by Item Detail report.
The export settings matter, too. Cougar Mountain’s guide specifies that the Reports and Graphs Company Preferences setting under Reports – Show Accounts By must be set to Name only for these transaction history imports.
You may need to customize your QuickBooks reports to include the required fields. Review the QuickBooks import guide before exporting your files.
How to import QuickBooks data into Denali
Once your files are ready, you can begin setting up the Denali organization and importing your records.
Step 1: Prepare Denali for the import
Before starting, make sure a demonstration organization or another organization is installed in Denali. You’ll also need Excel installed on your system.
Open the Denali Controller module and select the existing organization to access the software. From there, you’ll create the organization that will hold your imported QuickBooks data.
Step 2: Create a new organization
In the Controller module, navigate to Company Options > Define Company Information. If you’re using Fund accounting, the menu will display Organization instead of Company.
Select New and choose the appropriate accounting type: Fund or Non-Fund. In the organization creation window, select Import from QuickBooks and continue.
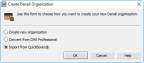
This starts the import process for your QuickBooks master files.
Step 3: Import your master files
Select the Excel files you prepared for the records you want to import. These can include general ledger accounts, customers, vendors, inventory items, and employees, depending on your requirements.
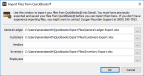
Once you’ve selected the files, start the import. Denali will generate an error report if it encounters problems with the files. Correct the reported errors before continuing. Warnings may also appear for issues that the system can import but that you may want to address.
For Fund accounting organizations, the process also includes setting up the required fund account segments.
Step 4: Import transaction history
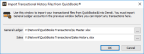
After importing the required master records, you can select the transaction history files for General Ledger or Sales.
There are dependencies to keep in mind. General ledger accounts must be imported before general ledger transaction history. Sales transaction history also requires general ledger transactions to have been imported.
Select the applicable Excel files and run the import. Review any errors and warnings, and resolve issues that could affect the accuracy of your records.
Step 5: Complete your Denali setup
Importing the files doesn’t finish the entire setup. You’ll still need to enter your organization information, install any additional modules you plan to use, and configure your fiscal calendar.
Pay particular attention to the fiscal calendar. It affects how transactions are posted, and changing it after transactions have been posted can be difficult.
You should also complete the minimum setup required for each module before using it for regular accounting work.
For detailed instructions, refer to Cougar Mountain’s QuickBooks import documentation.
What data can be imported?
The following table summarizes the main data categories covered by Denali’s QuickBooks import process.
| Data category | What to check |
| General ledger accounts | Confirm account records, including inactive accounts if importing transaction history. |
| General ledger transactions | Prepare the required Transaction Detail by Account export and confirm account records have been imported. |
| Customers and vendors | Check the exported records and correct any errors reported during import. |
| Inventory items | Confirm that the required item information is included in your export. |
| Employee records | Review the employee data being imported and identify any additional payroll setup required. |
| Sales transactions | Prepare the Sales by Item Detail export and import the required general ledger information first. |
The records available for import depend on the files you prepare and the requirements of each data category. Don’t assume that every field, report, or historical detail in QuickBooks will automatically appear in Denali.
If you’re using a conversion service instead of performing the import yourself, confirm the supported data categories, eligibility requirements, and any exclusions with Cougar Mountain before proceeding.
Common migration challenges
Several issues can complicate a QuickBooks-to-Denali migration. Knowing what to check beforehand can help you address them before the new system is used for everyday accounting.
Incorrect or incomplete export files: Missing fields or incorrectly configured reports can prevent data from importing properly. Check the file requirements before exporting and review Denali’s error reports during the import.
Account mapping and transaction history: General ledger transactions depend on the relevant account records being imported first. Missing accounts or incomplete transaction exports can affect the information available in Denali.
Incomplete historical information: Some businesses need years of transaction detail, while others mainly need opening balances and selected records. Decide what you need before beginning and confirm how any information that isn’t imported will remain accessible.
Incomplete module setup: Importing records does not automatically mean every module is ready for use. Review the setup requirements for the modules your business needs, including payroll, inventory, and other applicable functions.
Verify your financial records before going live
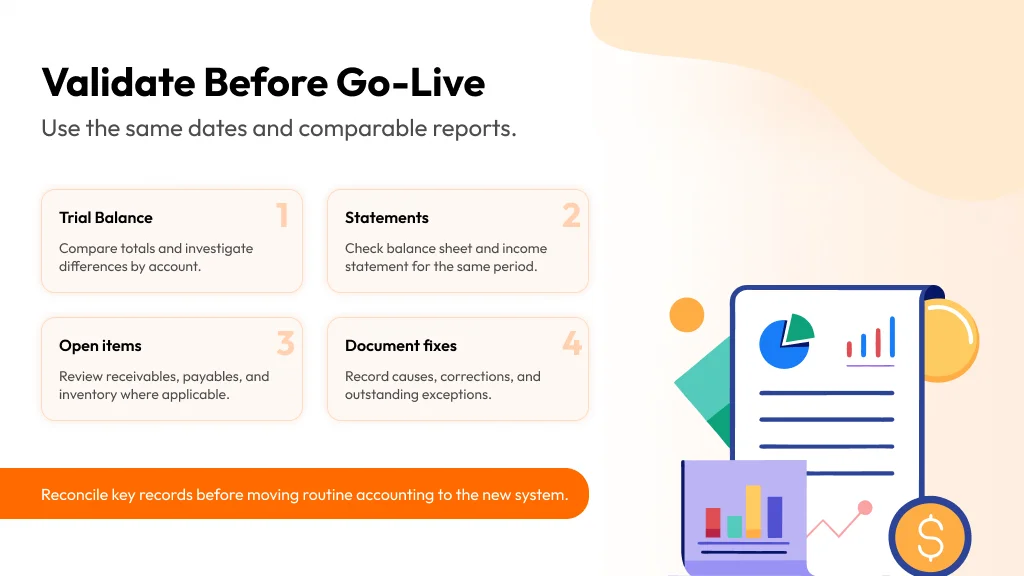
After importing your data and completing the initial setup, compare the information in Denali with your saved QuickBooks reports.
Start with the trial balance, balance sheet, and income statement for the same reporting period. Depending on your setup, you may also need to check accounts receivable aging, accounts payable aging, inventory records, and transaction details.
If a balance differs, investigate the reason before making adjustments. Check the reporting dates, account setup, imported transactions, and any records that were excluded from the import.
For example, suppose your QuickBooks trial balance shows a different total from the equivalent Denali report. First, confirm that both reports cover the same date and use comparable settings. Then review the affected accounts and transaction history to find the source of the difference.
Document the cause and any correction made. This gives your team a record of what was checked and helps prevent unresolved discrepancies from carrying into regular accounting work.
Prepare your team for the transition
Once the records have been checked, test the accounting tasks your team handles most often. This could include entering vendor bills, recording customer payments, reviewing account balances, and generating financial reports.
Have the employees responsible for these tasks work through the relevant processes before the system becomes part of their daily routine. Confirm that they understand where to find information, how to complete their work, and who to contact if something doesn’t look right.
Choose a go-live date that gives your team enough time to complete these checks. If possible, avoid making the switch during a busy reporting period or a critical financial deadline.
Is Denali the right QuickBooks alternative for your business?
Moving from QuickBooks to Denali is worth considering when your accounting requirements call for a different set of workflows, modules, or reporting capabilities.
Before making the decision, compare the available Denali options with your needs for general ledger, payables, receivables, inventory, payroll, reporting, and integrations. Confirm any essential requirements with the Cougar Mountain team, particularly where your processes depend on specific features or historical data.
The migration itself is only one part of the decision. Your new accounting system also needs to support the work your team will perform after the transition.
Explore Denali: Denali Business | Denali Fund
QuickBooks-to-Denali migration checklist
Before completing your migration, make sure you have:
- Backed up your QuickBooks company file and saved key financial reports.
- Reviewed your records and identified the data you need to transfer.
- Exported the required QuickBooks reports to Excel.
- Checked the file requirements for general ledger and sales transaction history.
- Imported the required master records before transaction history.
- Reviewed import errors and warnings.
- Completed your Denali organization, module, and fiscal calendar setup.
- Compared key financial reports and investigated discrepancies.
- Tested routine accounting tasks with the relevant employees.
- Documented outstanding issues and confirmed support arrangements.
Plan your move from QuickBooks to Denali
A successful migration starts with knowing which records you need, preparing the required exports, and understanding what needs to be configured in Denali. Take time to check the imported data and test your team’s routine workflows before moving your accounting work to the new system.
If you’re considering Denali, review the import requirements and discuss your current setup with Cougar Mountain to determine the right approach for your business.
Next step: Review the QuickBooks import guide or contact Cougar Mountain to discuss your migration requirements.
Frequently asked questions
- Can I import QuickBooks data into Denali?
Yes. Denali includes a process for importing supported QuickBooks data. You’ll need to export the required information to Excel files and follow the import steps in Denali. The available records depend on the data you’re importing and the applicable file requirements. - Will all my QuickBooks data transfer to Denali?
Not necessarily. The import process supports specific master records and transaction history files. Check the requirements for each data category and confirm how any information that isn’t included will be retained. - Do I need Excel to import QuickBooks data?
Yes. Cougar Mountain’s documented import process requires Excel files exported from QuickBooks, and Excel must be installed on your system. - How do I check whether my migration was successful?
Review Denali’s import error reports, complete the required module setup, and compare key financial reports against your original QuickBooks records. Investigate differences before relying on the new system for routine accounting. - Where can I get help with the migration?
Start with Cougar Mountain’s QuickBooks import guide. If you need help confirming your requirements or evaluating a conversion service, contact the Cougar Mountain team.